Automate file timestamping with Google Drive
Create proofs for every file saved on the cloud
With this tutorial, you will be able to timestamp all files in one folder. This folder can be in your favorite cloud service.
Each time you will add a new file to this folder, it will automatically be time-stamped and you will obtain irrefutable proof of existence.
1. Create a Woleet and Zapier account
- Refer to the article "The Woleet Zap" in Woleet Zapier category
2. Make an automation zap
- Go to Zapier and make your Zap.

Make your zap to automate file timestamping
3. Choose a trigger app
- In this tutorial we will use Google Drive

Choosing Google Drive Trigger
- We will timestamp all files that will be added to a folder. In this case you must choose the trigger: "New File in Folder" (see the picture below)
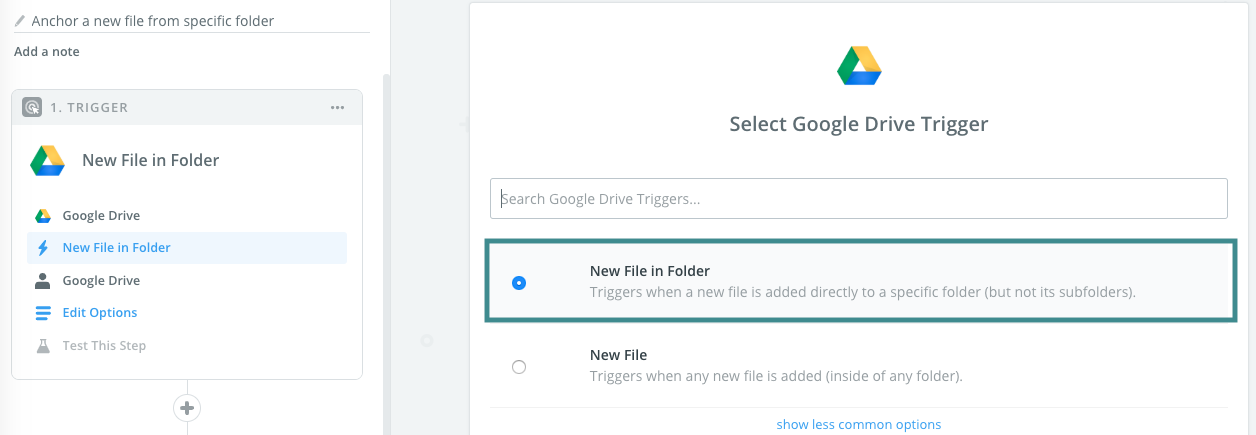
Choose a specific trigger from Google Drive
- Now you have to connect your Google account

Connect your Google Drive Account
- Once the google account is connected you have to choose your Drive, most of the time it will be called "My Google Drive".
- Then you have to choose the folder where files will be uploaded. This folder must exist in your Drive before you can select it from the drop-down menu.
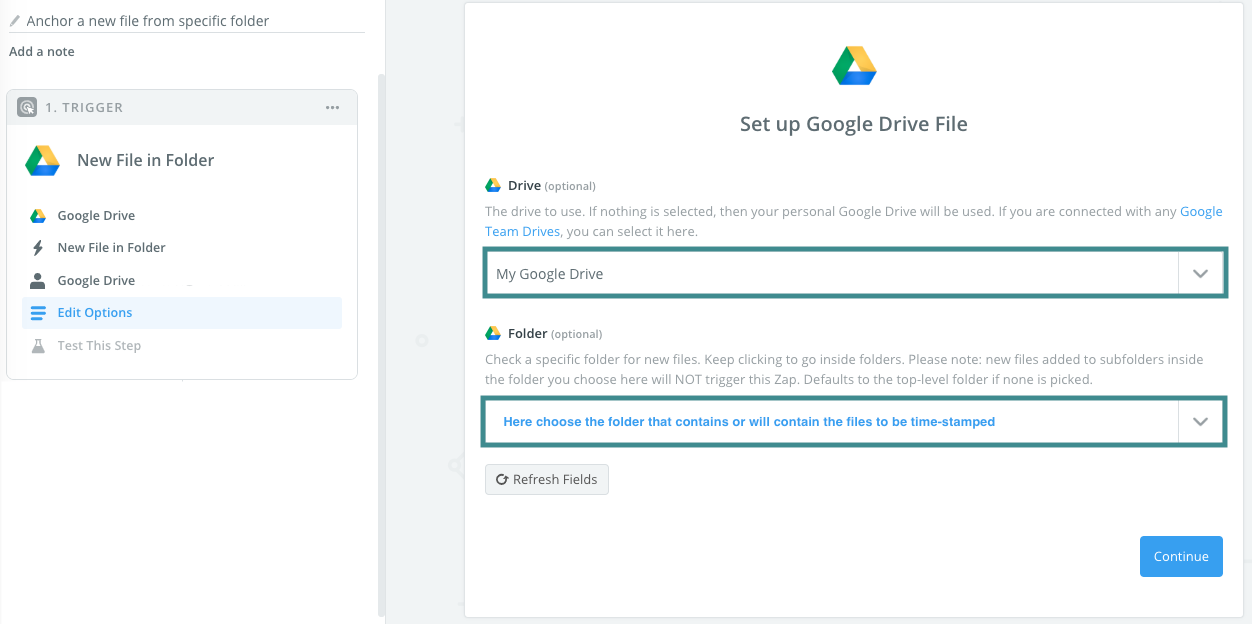
Choose your Drive and your Folder
- Now it's possible to test that the link between Zapier and the folder selected in your Google Drive is functional.
4. Select an action : Woleet Zap
-
After setting the trigger you have to choose an action to be performed.
-
In this example, each time a new file is added to a folder it will be time-stamped.
Choose your action zap
- We choose the Woleet Zap (see the picture below)
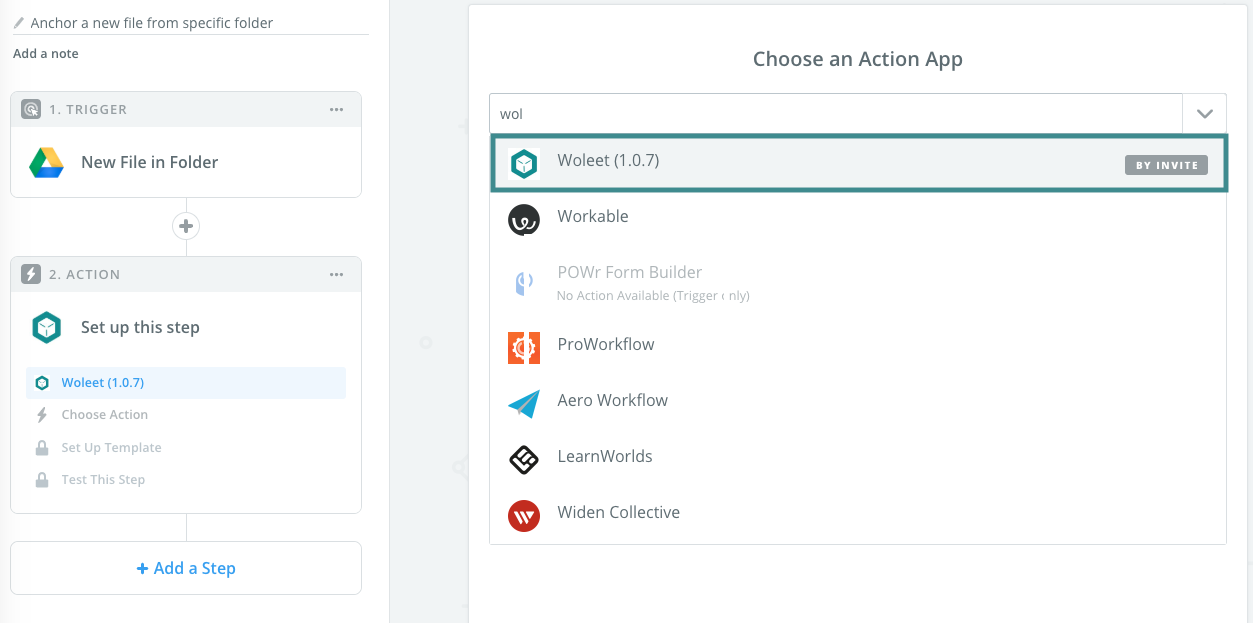
Choosing Woleet Action
Choose a specific Woleet Zap Action
- To timestamp a file, you must choose the option "Anchor a File"
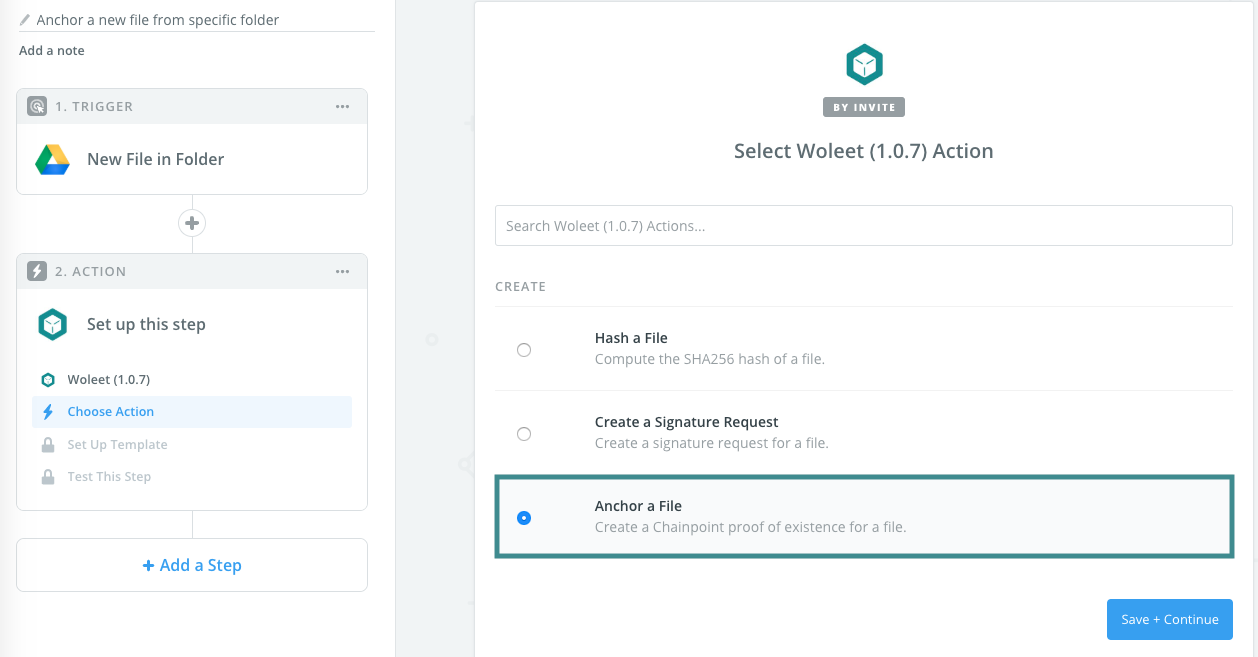
Choose a specific action from Woleet
Connect your Woleet account
- Now you need to connect your account. You will found your own API Key in your Woleet account. Go to your personal settings and copy/paste your personal API Key.
- Becareful do not share this Key API with third parties. This Key is personal. This API Key allows you to use your Woleet account through other web solutions such as Zapier.
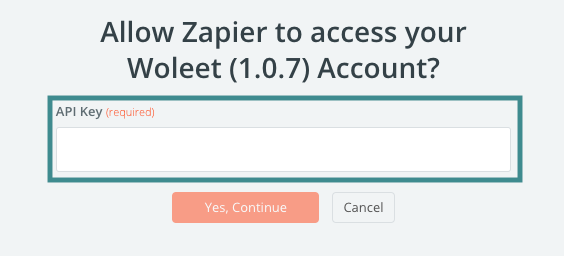
Connect your Woleet account with your API Key
- Your personal Woleet account is connected now
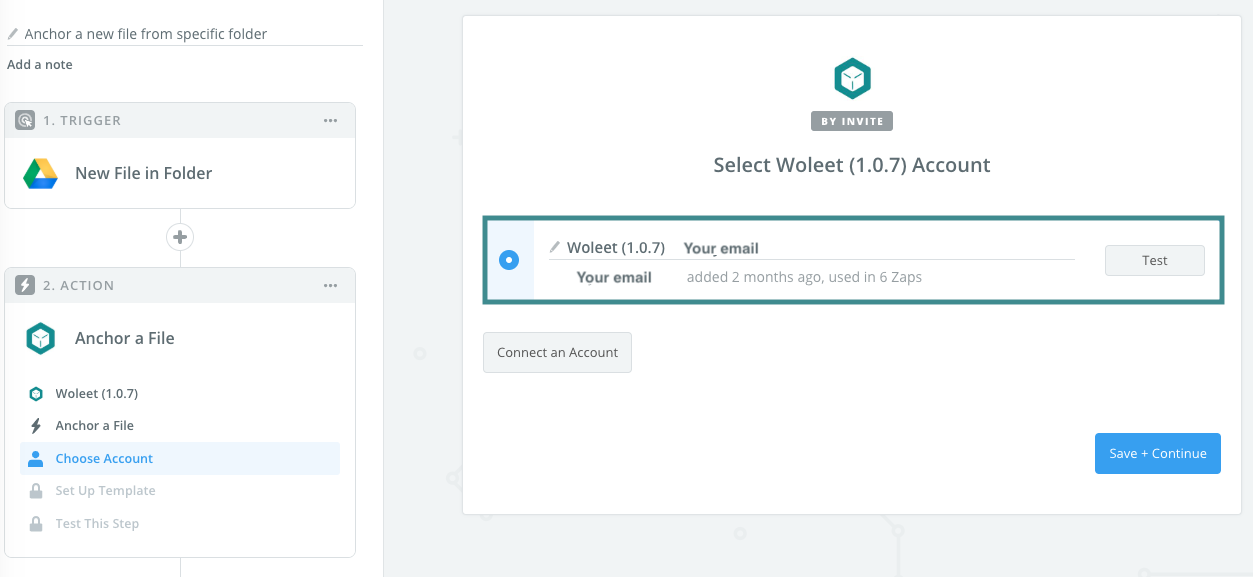
Connect your Woleet account
Set up the Woleet Anchor Action
- First in the "File" drop-down menu you must choose the "File - (exists but not shown)" field. This is the file that comes from the folder previously selected.
- Then you have to choose a title for your timestamp
- You can put your timestamp public or not
- And you can choose some "Tags"
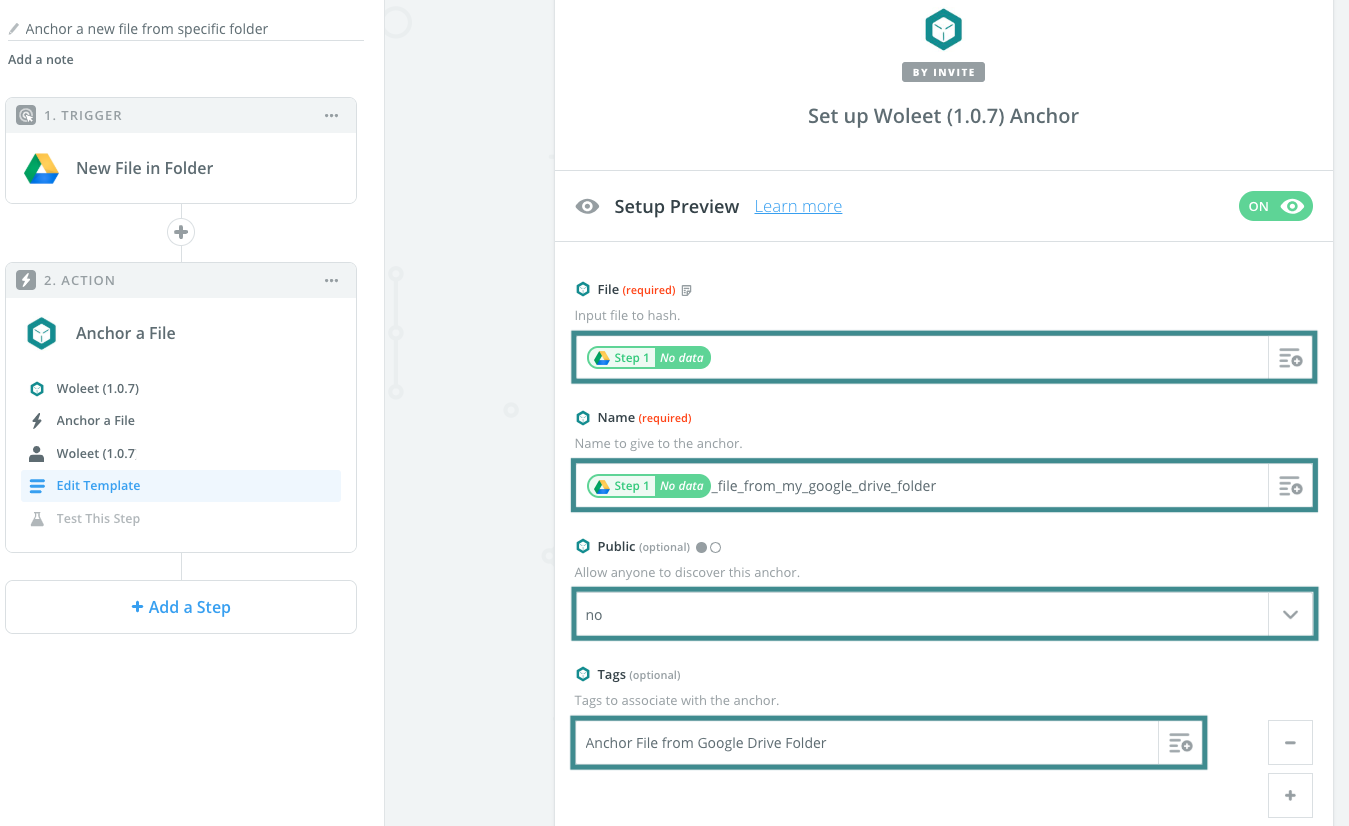
Choose which data to timestamp (File and Name are required)
Active this automation
- Finally you need to activate your Zap
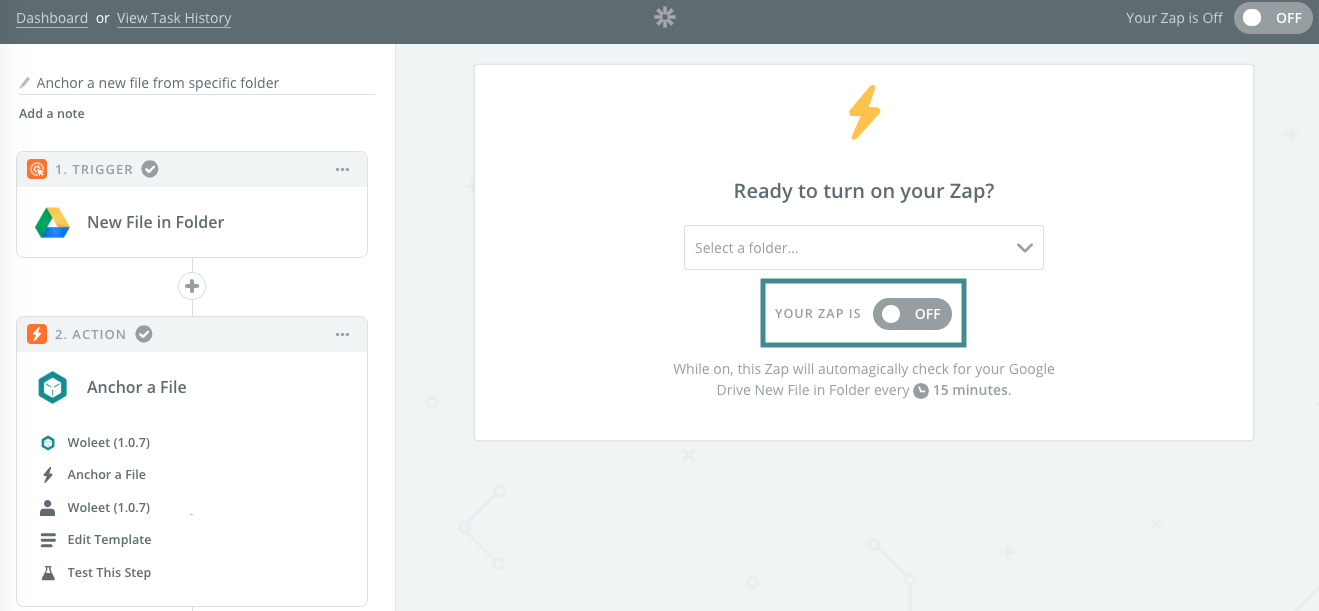
Activated your automation
That's it ! 🎉
Updated about 7 years ago
